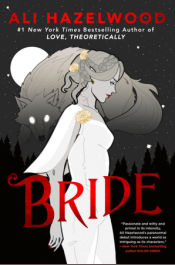
![]() |
![]() Margit's Journal Cover In Home Free, Margit's teacher gives her a journal. Margit uses it to write down her memories of her experiences in Czechoslovakia, her fears for her father and her family, and her hopes for the future. Follow the instructions below to make an easy and inexpensive cover for a plain journal of your own. You can copy the cover shown here, or you can design your own. Of course, the most important part of the journal -- the hopes, dreams and stories you'll write in it -- are all up to you! Materials Journal and Cover
Instructions 1. Using the fabric measuring tape, measure the journal's cover from front to back. Line up the end of the tape with the edge of the journal's front cover, then carefully run the tape around to the back cover. Add 3 centimetres to this measurement: this will be the width of your journal cover. Now measure the journal from top to bottom and add 3 centimetres: this will be the height of your journal cover. ![]() 2. If your journal is small, you may be able to cut the cover out of one piece of felt. However, you will probably have to glue two pieces together to make a piece that's big enough. Simply run a line of white glue along the edge of one piece of felt, then carefully line up a second piece on top. The seam should be about 2 centimetres wide. Set aside and let dry. When dry, trim the felt to the measurements you collected in step 1. 3. Cut 2 strips of felt that are 7 centimetres wide and the same height as the large piece of felt. Run a line of glue around the top, bottom and one long side of each strip, and glue to the ends of the large piece of felt. Set aside and let dry. Trim edges with pinking shears if you want a decorative edge. ![]() 4. In the meantime, decide on what design you would like for your cover. Do you want to include your name? Would you like to design a picture that can be assembled out of felt appliqués? Try sketching your design on a piece of paper. 5. Using the scraps of different coloured felt, cut out appliqué pieces and arrange them on the right-hand side of the journal cover. When you are satisfied with the arrangement, glue them in place. Set aside and let dry. 6. When the appliqués are dry, decorate them with fabric paint. Sew or glue on sequins or beads, if you like. You can also write your name on the cover using the fabric paint. (You might want to trace it in pencil first.) Set aside and let dry for at least 12 hours. ![]() 7. Insert your journal into the cover. First insert the front cover into the flap underneath the decorated area, then insert the back cover into the back flap. You may have to bend the book back on its spine a bit to get the back cover into place. |